Having decided to construct my own grey water irrigation system I figured he first step was to do some flow measurements of the shower and bath outlets. It was easy enough and it involved a stop watch and a 20l bucket. The results were as follows:
Bath was on average about 75 litres in total and it emptied at a rate of about 0.71 l/s
Shower was less at about 0.3 l/s giving about 60 l for a 3 min shower
Other design considerations were system needed to be fully automatic and pretty maintenance free. I also discovered that it is not a good idea to store your grey water as it promotes the growth of pathogens – so ideally the system should empty the sump at least once a day and the water spread over a large area so nature (mostly the sun) can kill the nasties.
My early idea was a 100 l sump which could buffer a bath been emptied with a submersible pump and a filter box of some sort (see sketch). After a bit of investigation I discovered that submersibles are expensive – tend to clog easily and have seals that detergents and soaps love to attack. So short of spending loads of money on a good quality submersible which could handle the above, I decided an external pump was the way to go.
The smallest one I could find was a Pedrollo xxxx which has a nice little brass impellor was simply chops up any hairs. The rated pressure and flow capacity of also meant that I could have a nice sprinkler pressure. Armed with a 90 l plastic tank and a level control switch it was time for installation.
Part 2 – Design
Having decided to construct my own grey water irrigation system, I figured he first step was to do some flow measurements of the shower and bath outlets. It was easy enough and it involved a stop watch and a 20 l bucket. The results were as follows:
Bath was on average about 75 litres in total and it emptied at a rate of about 0.71 l/sec
Shower was less at about 0.3 l/sec giving about 60 l for a 3 min shower
Other design considerations were that the system needed to be fully automatic and pretty maintenance free. I also discovered that it is not a good idea to store your grey water as it promotes the growth of pathogens – so ideally the system should empty the sump at least once a day and the water spread over a large area so nature (mostly the sun) can kill the nasties.

Grey Water Design Sketch
My early idea was a 100 l sump which could buffer a bath been emptied with a submersible pump and a filter box of some sort (see sketch).
After a bit of investigation I discovered that submersibles are expensive – tend to clog easily and have seals that detergents and soaps love to attack. So short of spending loads of money on a good quality submersible which could handle the above, I decided an external pump was the way to go.
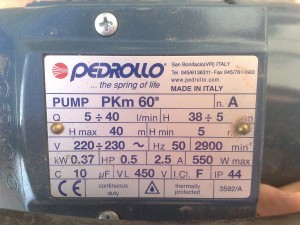
The smallest one I could find was a Pedrollo PKm 60 which has a nice little brass impeller was simply chops up any hairs (ie ditch the filter). The rated pressure of max 38 m and flow capacity of max 40 l/min (0.66 l/sec) also meant that I should have a nice sprinkler pressure. (Price R1500 ~ $150)
Obviously in practice you will probably operate some in the middle of the figures quoted above, namely as the flow increases the pressure will drop (each pump has its own operating curve but I wont go into that now). I found in practice my system flow matches the shower flow of about 0.3 l/sec , but as a result has an impressive pressure (probably a bit on the high side so I might add another sprinkler head to pull it down on the curve a bit).

Pedrollo PKm 60
To make the system operate automatically I bought a level simple floating level control switch which is very commonly used in pump stations. It allows you to have the pump turn on when the level gets to a chosen height – it also then turns of the pump when the sump is empty (Price R250 ~ $25).
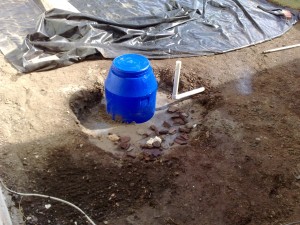
So Armed with a 90 l plastic tank (Price R 150~ $15 ) , pump, a level control switch and a whole bunch of fittings (Price R 100~ $10) – it was time for installation.


